Procedural Animation & Camera Projection
OK, the main idea was there is a rail system and boxes transferin with small holder via rail.
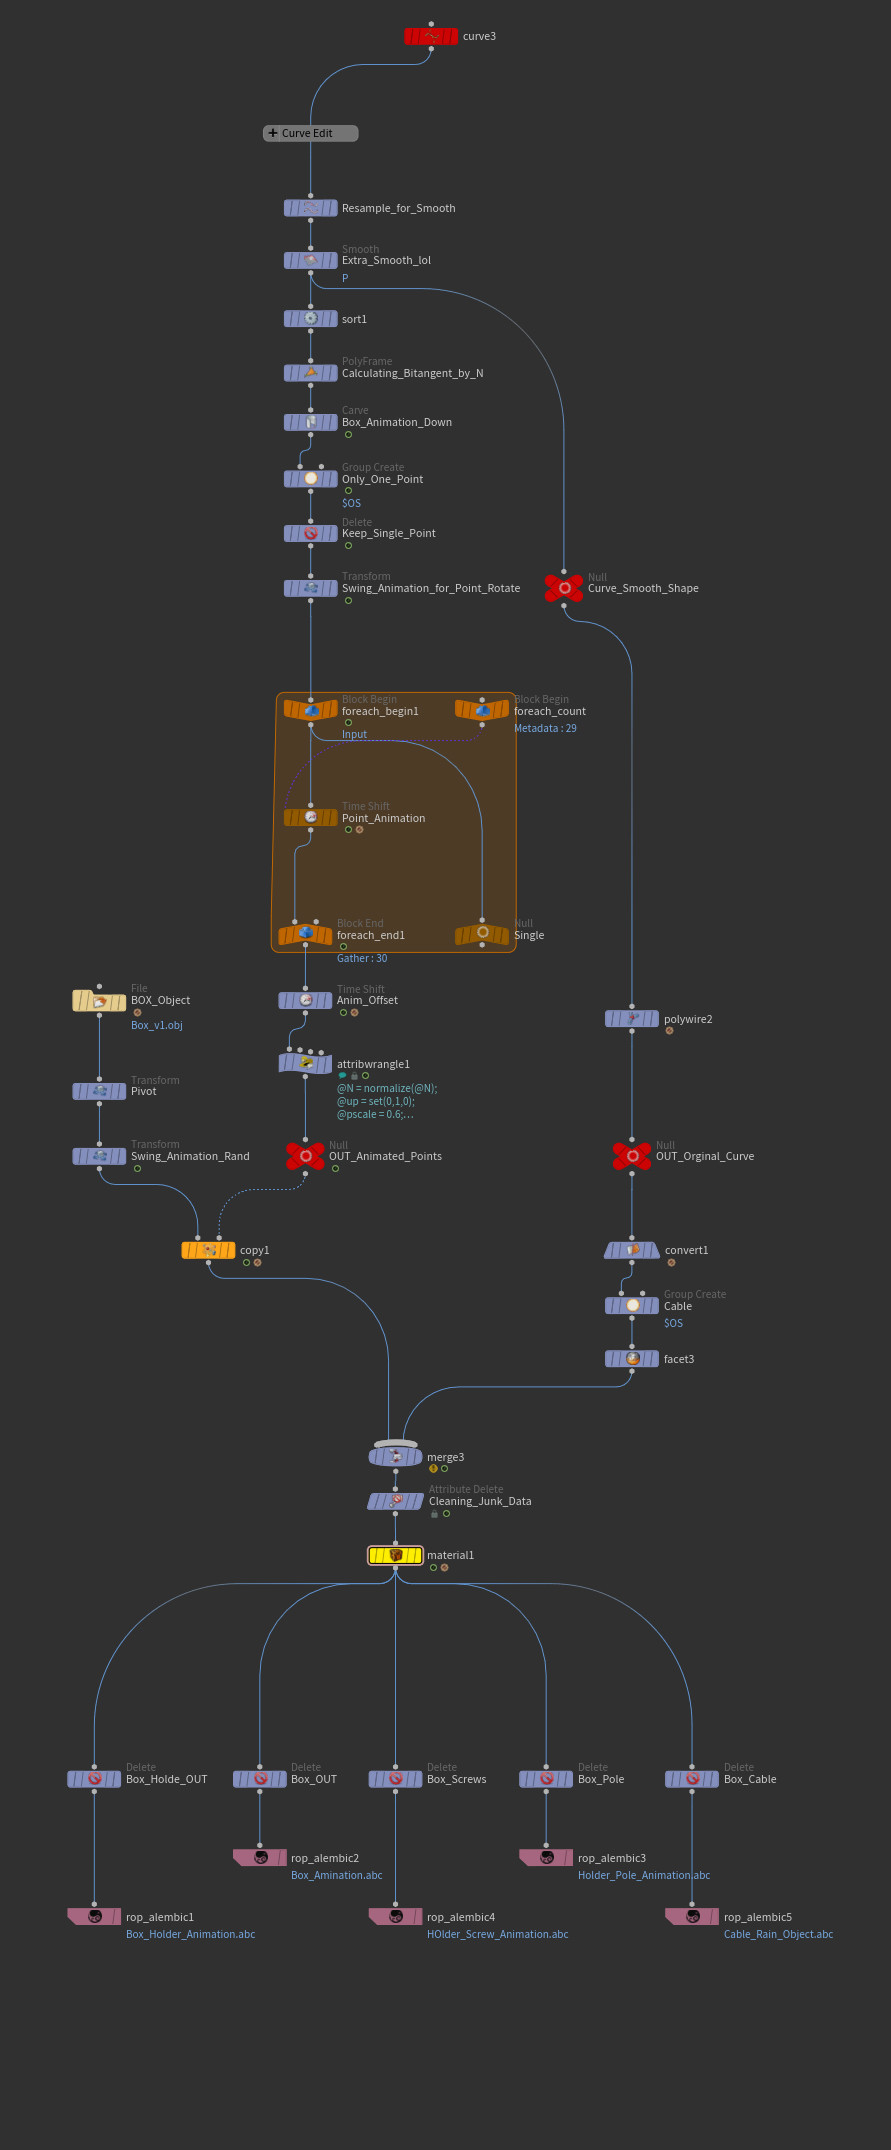
I have created a rail first. Created basic curve and shape it through the art director's directions on the scene. That was the most challenging part actually :) i had many revised for shaping of the rail system. So , anyway... After rail curve is done! i sort them , first (0) point was on the top and the last point close to the ground. Added poly frame for calculating N through curve long like the image on below. I usded Poly Frame to calculate N like this becasue easy and fast also cheap method.
I added Carve node to give an animation to curve and deleted rest of the points but 0 one! Thats the key actually. I need only the one point for animaiton and taking that animatin data from my main curve. If i get another revised from the director about the curve. ıt will change the animation automaticly when i edit my curve. And also gave little bit random swing to my point. Actually it is just a rotation.
I usded fit11(rand($FF*5),-10,10) this gives rotation between -10 and 10 , 5 times on sin which means 5 swing on total frame

OK, This is how i multiplied my animated point 30 times in a row. I used for loop and got the iteration data for timeshift node. I added like $F-detail(-1"iteration",0) * ch("Random")
OK this is taking the iteration data and multiply it with the chanel that i created on Random name which 30 times. So this gives me 30 points animation and iteration number from the loop will give me timeoffset.
For example if my iteration number is 10 , that will give me 10frame timeoffset for each points. Which will make first point on time , second point will start 10 frames later, third point will start 20 frames later, fourth point will start 30 frames later bla bla bla...

So this is how i project the video footage to meshes on the scene! Well meshes has uv actually but that uv doesnt work with the video footage. I added uvtexture node and selected Cameara input as a texture type. This method creates uv from the camera view and work very good actually. I have use it many times, one of my favorit also lol
And this is how uv looks after projecting from the Camera
After changed/arranged uv , i added materiel node and created simple, basic , easiest material and added video footage as sequance jpg

This is how i arrange uv texture and materiel also

This is how it looks after i projected uv to the mesh and added the video footage to meshes also. I deleted some parts becasue of i didnt need them like ground , boxes or so. I kept like this becasue of some boxes were going back side of the small tower. I didnt want to roto/mask them while comositing, I adjust that small tower's mesh as close as the video but still needed some roto while compositing

On this picture there are projected meshes and video footage also. So, i combined them both to show how it looks

Total workflow , easy and simple scene for this project. For render , our rendering department didnt want me to export all file in one so i exported them the way they want lol