While i am working at Lighthouse VFX Studio , we were making our grasses using Softimage and Maya setup. After that we decided to make our grass setup in Houdini. So after working about it couple days i have created this grass setup. So, i can share with you guys if anyone need a setup like that.
This is the project like: Houdini Procedural Grass Setup


- This setup is all procedural and so easy to change little things. File2 node ( i dont know why i didnt change the name lol) is input geometry data. After that i am scaling geometry to 0.01 because of geometry is very big and i like to play with small number. So... I am making three part of geometry.
1- Grass area
2- Play area ( all animation's area , that will change for each episode or project)
3- Road area

Ok first i am calculating the distance which i will use this first and taking output .

Remeshing the geometry then transformed it on Y direction and scaled 0.999 , 1, 0.999 just because it worked better when i do this. I dont know why lol So after that i used ray sop to ray it to the original geometry ground and grouped them so this way i had a data for only the edge of the geometry. Because i will use that point data for point cloud to create border data

I have calculated distance before and created maxdist data also using point cloud. With this VOP SOP i am using distance and maxdist data for creating color to create a border for the geometry. My color ramp is between white and black and with this method, i am creating all-white geometry with a black border
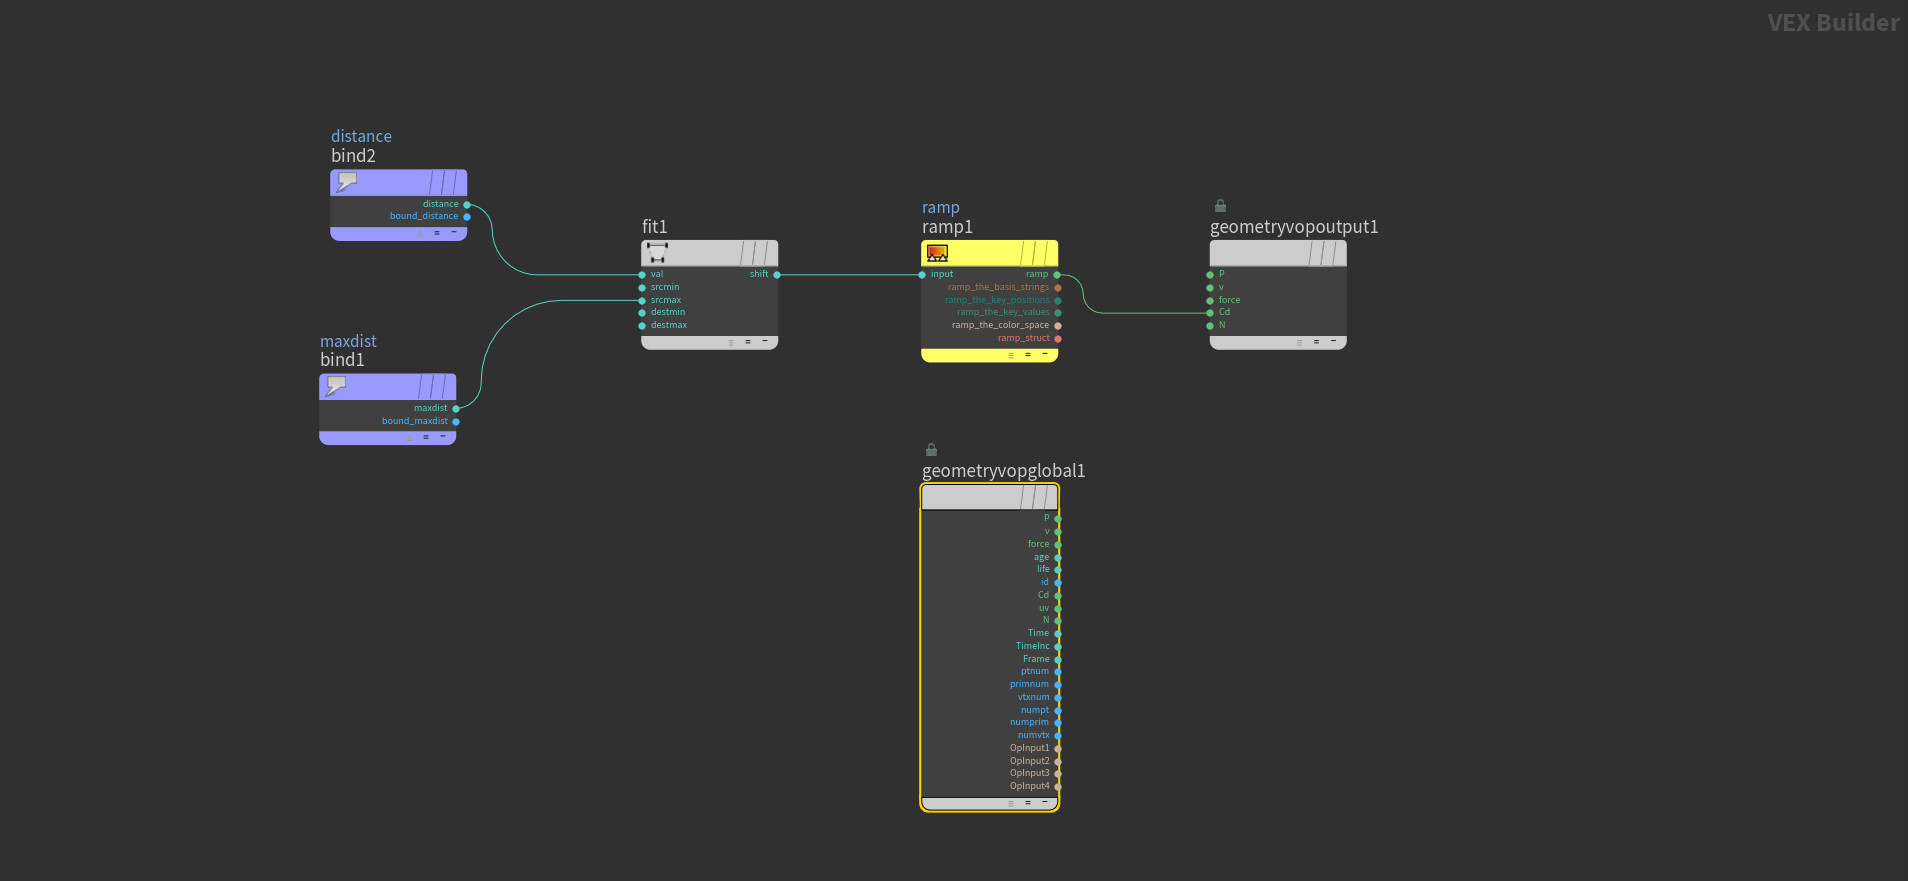
Attribute blur after point cloud

This is a point cloud example for creating a color gradient. With this method, i am taking data from the road and with point cloud data giving a gradient color to the geometry which is creating white color as long as closer to the road and color getting gray and dark as long as the camera gets far from the geometry.
WHY?
Because this method is better optimization for Rendering. If grass closes the road there will be a higher density of the grass and far parts will have a lower density of the grass. This way grass geometry mesh will be lighter and also while rendering the grass it will be faster because of far distance will be in DOF and nobody will understand if there is a less amount of grass or high.

So, I deleted the geometry into two parts. Small_High_Group part is deleted by playground area which i have separated on the first image. So, this part will be a higher amount of the point scatter. And Group_for_Lower_Part will be very far apart and created another group on Big_High_Part. This part will have a high amount of the scatter point also.
Merged two parts of scattering and gave them a color randomly in VOP SOP between 1 to 0.75 and i used that color data for scale.y. This will give randomize scale differences between 1 and 0.75 which will make the more natural look.
On Grass_Color_Turbulance VOP i have created two types of turbulence color. So, i am giving one big color turbulence and one small color turbulence and mixing them each other. With this method i will have a good blend of turbulence and will use it for color and scale difference also
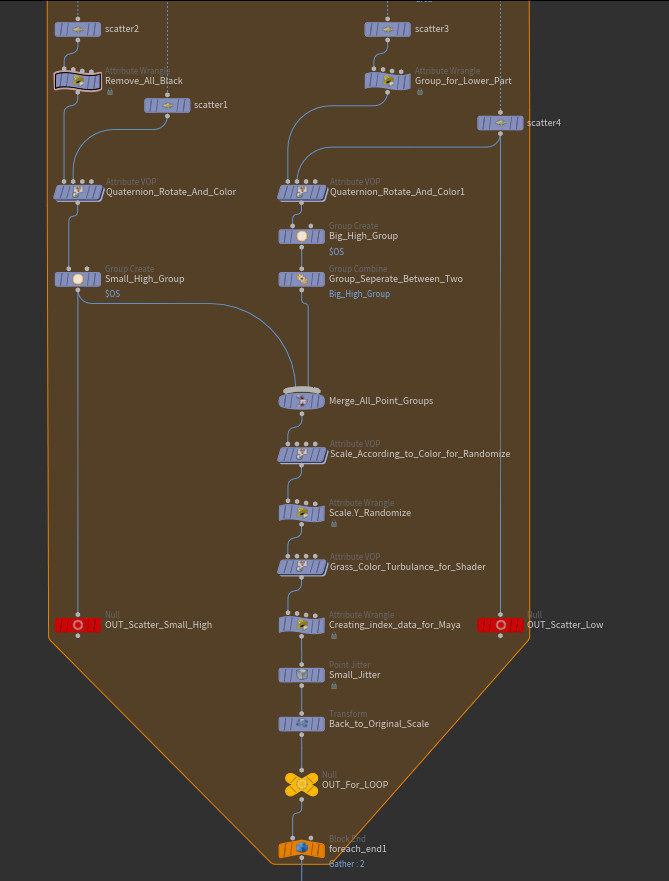
Ok this is the key point actually and hard to explain also. Basically i have created random orient data here. Because i want to have rotate data in point scatter. I will export this data to Maya and will instance there so this way i must have all data in point scatter. This one is creating orient data which mean is 4 vector data

And these are for MAYA actually. Just using color turbulence data, pscale data and orient data then converting them for Maya. Like Pscale to RadiusPP , Orient to RotationPP etc...

And this is the last result of the grass setup in Houdini viewport. If the grass is close to the road they are very small and low density on the edge of the road and grasses which is far apart to the road has higher. There is a color turbulence as you can see and light color grasses are the longer than darker color area

Thank you