Procedural Wind Motion for Static Tree

General / 30 April 2018


Small amouth of swinging tree from static tree with Houdini Procedural wind setup


I have created a wind motion system with Houdin VOP for static tree. This picture shows the black and white mask for which part of the tree will be effect from the wind and which part will stay static. 


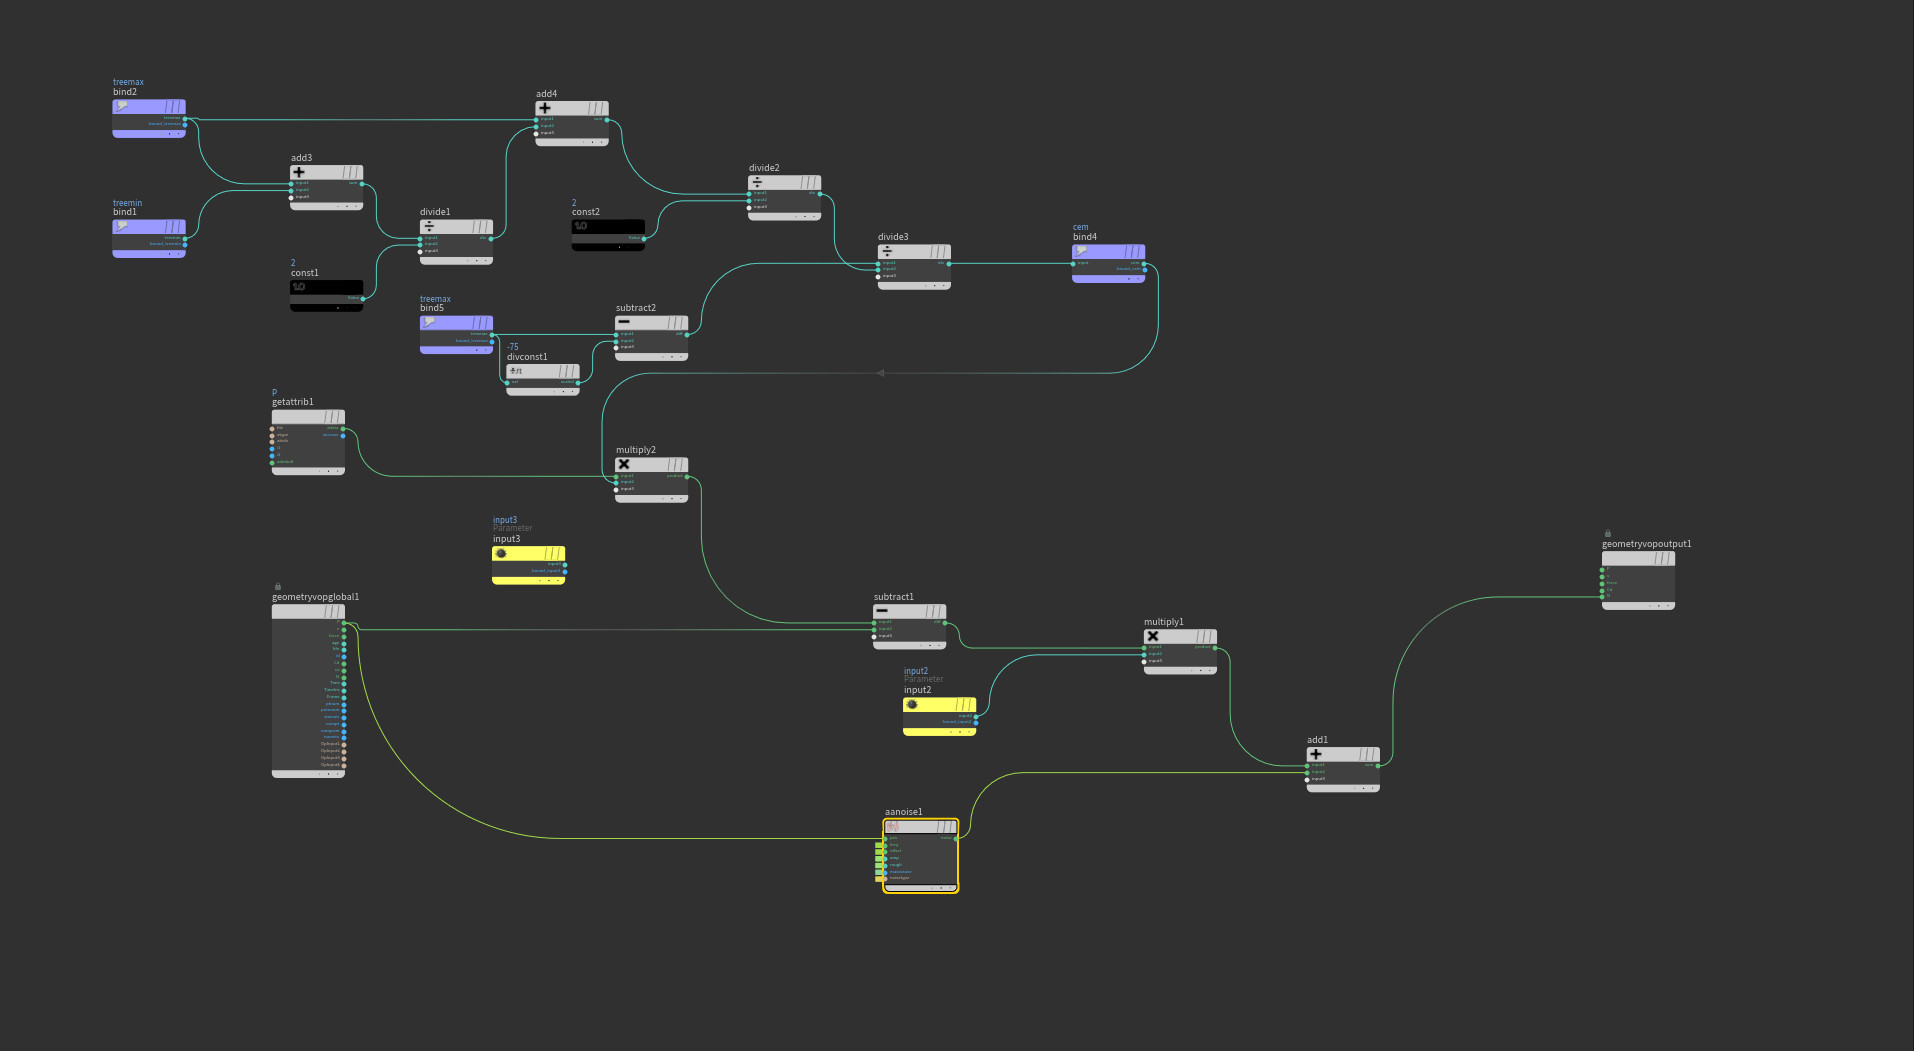
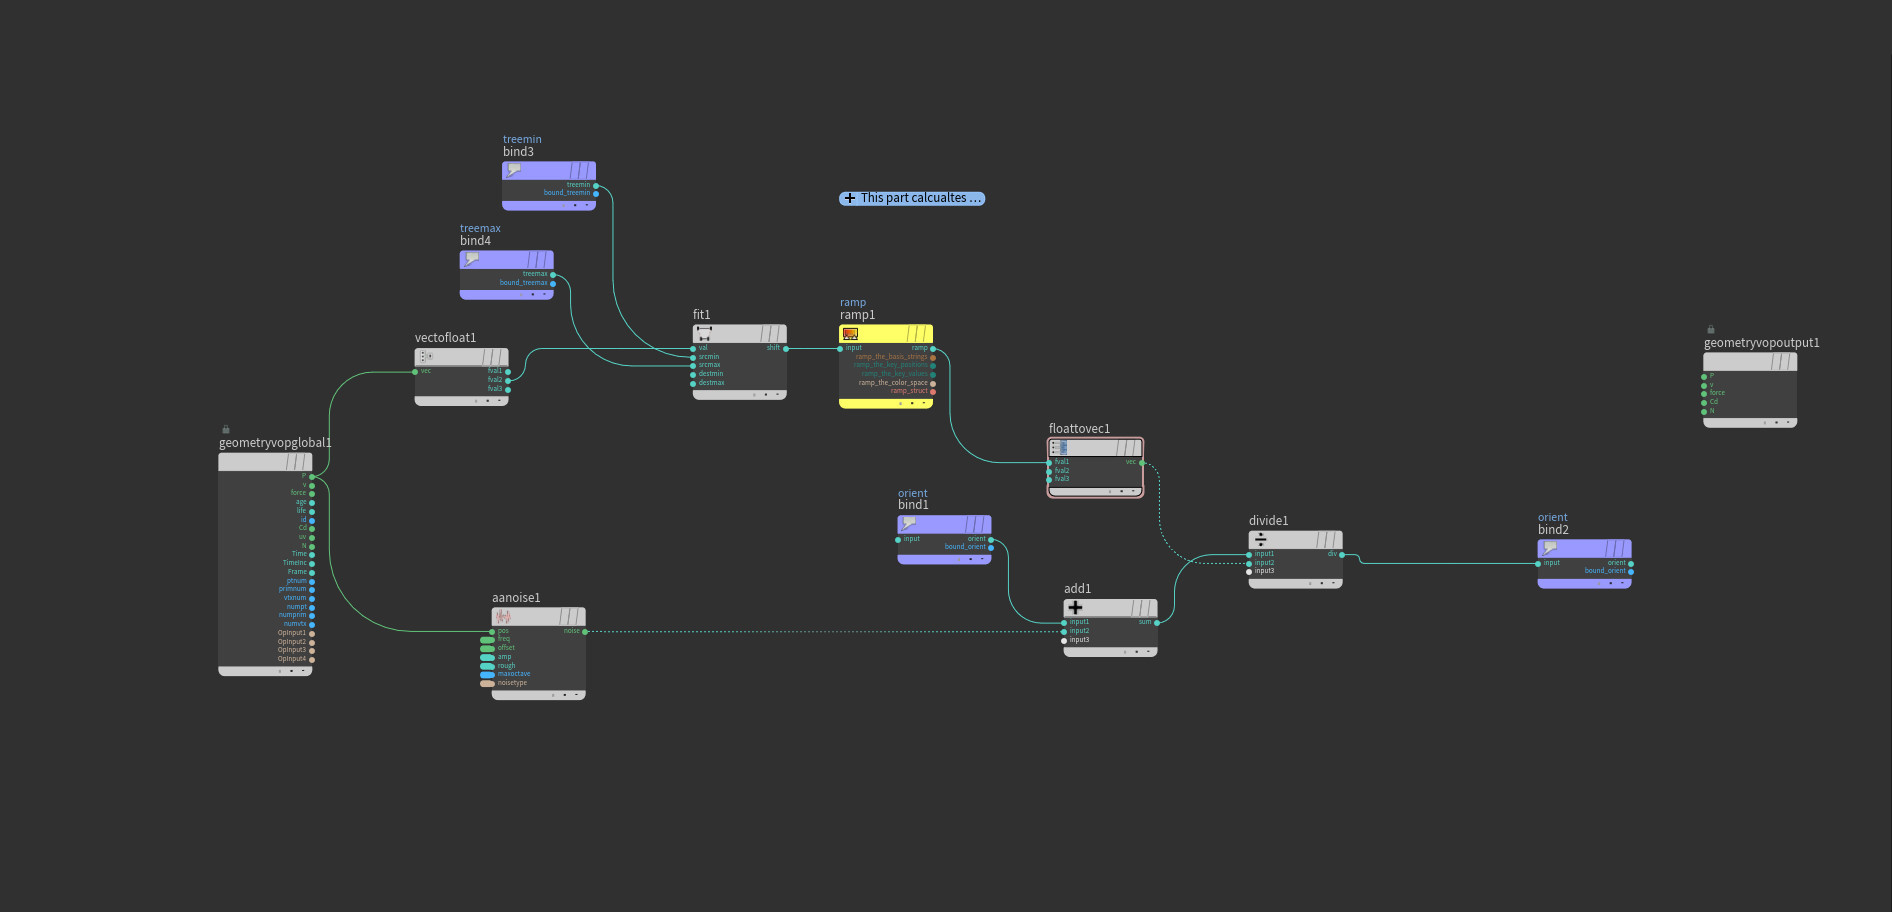
On this picture that you can see my VOP Sop setup for the wind motion. Basicly i have created two ramp for my mask and used an aanoise on Y direction.

-First ramp for Y direction. caltulated tree's max and min with $MIN $MAX expression and fit them to the ramp then multiplied with lenght.

-Second ramp for X and Z directions. I used max and min points of the tree and created a line from there. Then used that line for point cloud. This way i coult control for the lengh of point cloud then ramp it. With ramp i can play with black and white mask. Black part will stay static , white part will be effected by the noise. Ramp makes more smooth transition also.

After that ,i  used original Position of the tree and converted it to four way vector. I took X Y Z as three vector and Time for 4th vector input. This way my noise will multiply with the time. After that i took original Position and multiplied with Y and used the noise for only Y direction


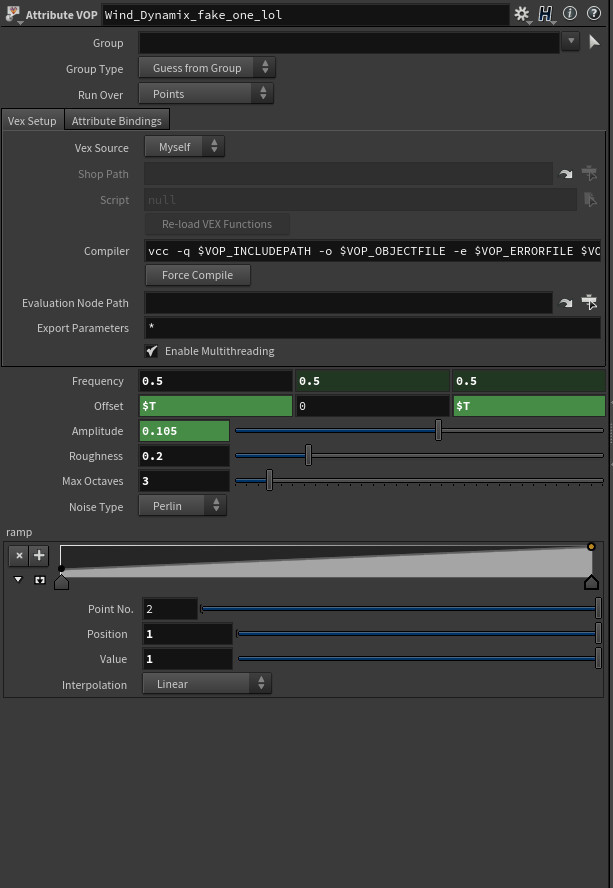
This picture is showing the control pannel for the wind and mask. With that two mask we can play for the wind effect level


After tree wind system is done i wanted to give little wind effect to leaves also. Leaves has an UV and we can use UV data for wind direction also. this way i decided to give wind on V direction. With this method each leaf's wind effect will start from the bottom to tip. For this method , first i created a grid and projected a UV then coppied that UV to each leaf. After sim is done i will get back the original UV. I like to use Compiled loop for foreach loop and that way trying to use nodes that can be in compiled loop becasue Compiled loop makes foreach loop 7-8 times faster depending your CPU becasue of multithreading your loop.  
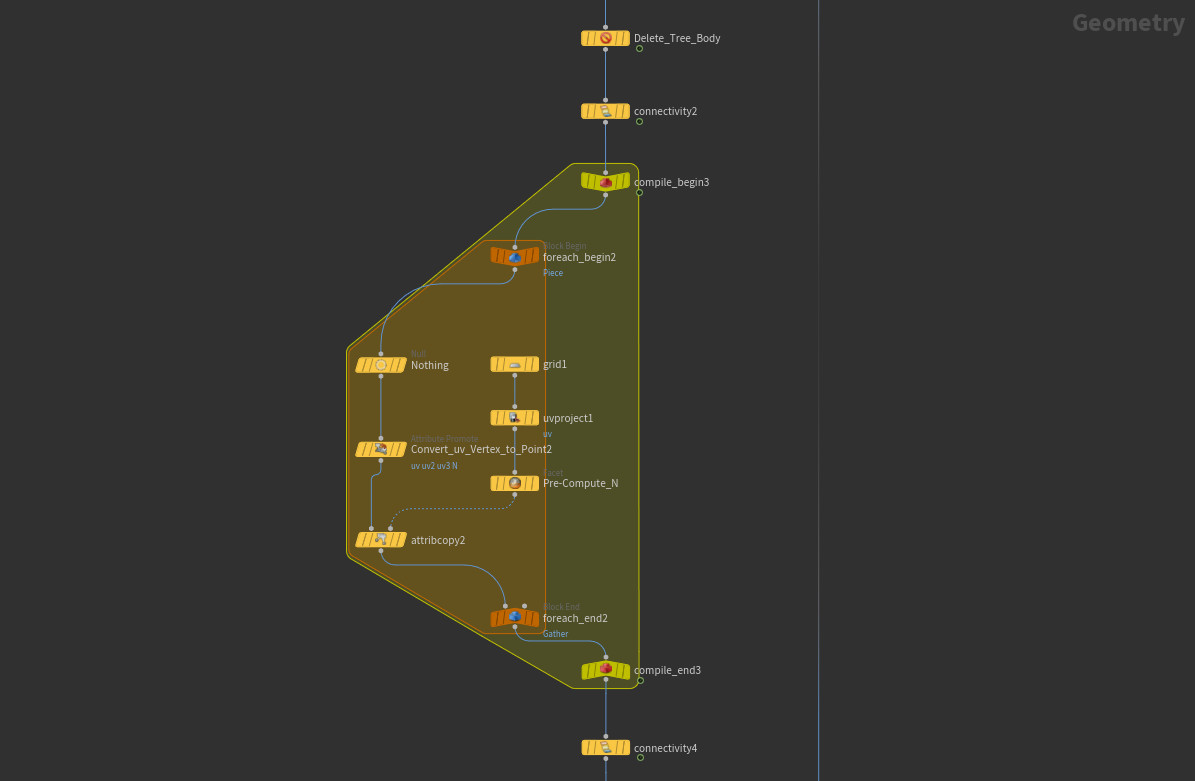


This is the loop for leaf wind system. First i deleted all points of leaf but 0 one and kept that 0 point for each leaf. Then used that point for origin point for the leaf and gave random rotation to leaves with fit11(sin($F*4),-10,10) expressions on Rot Y then calculated max and min points of the leaf and got avarage position of it. 

After all calculation stuff i used easy noise setup on UV's V direction and with secondary noise also. With all of this loop leaves will be rotating randomly (small amouth) , get noise from root origin and also taking secondary noise for geometry deformation.


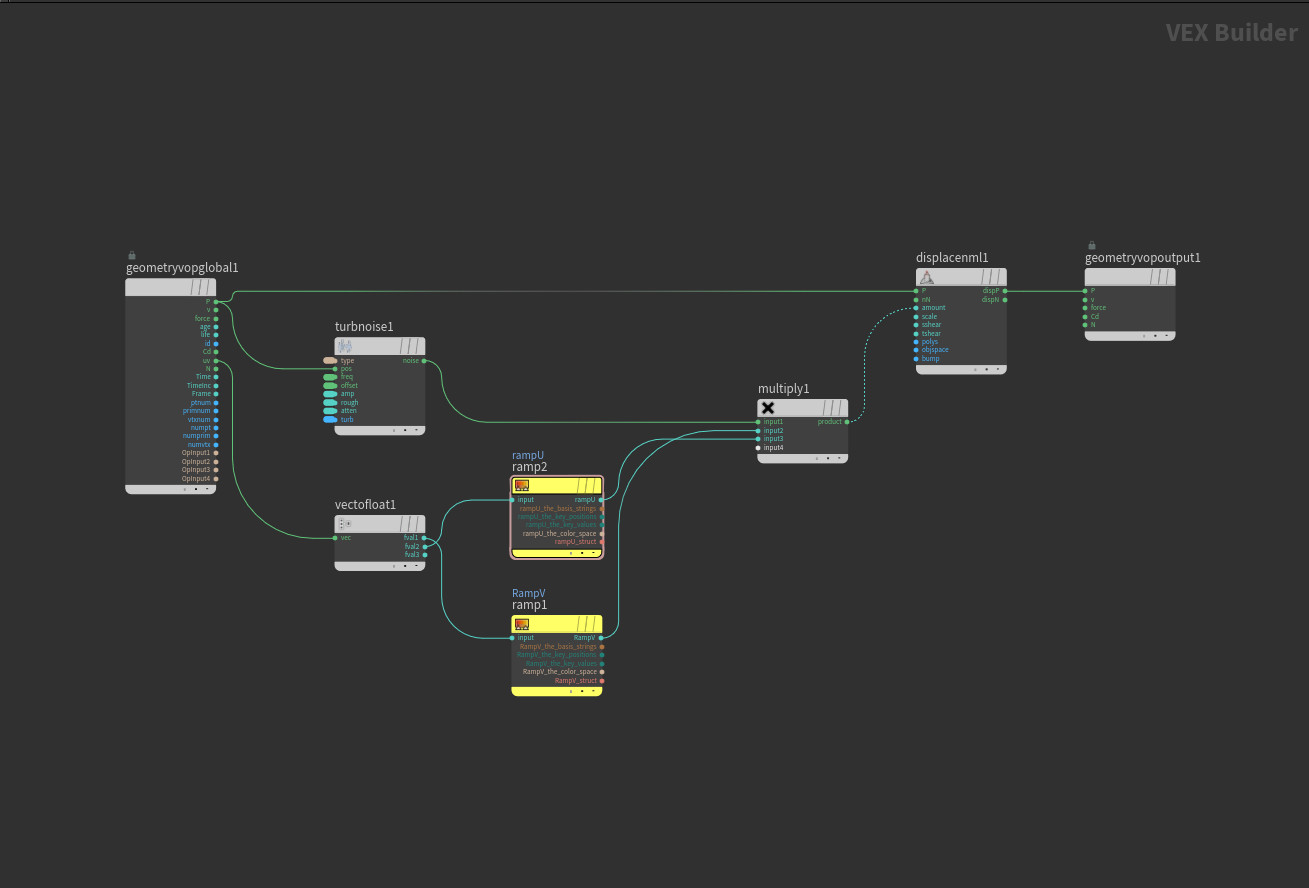
This is the simple leaf noise. I took original poisition and gave it turbulent noise. Then got UV data and created two Ramp for U and V for different effect of animation, multiplied them with turbulent noise and displace it for better noise and feed that as a position. That setup gave me easy and fast way for noise and wind effect

After all these arragement we had a Houdini digital asset for any kind of tree wind effect. For out project we had 10 to 15 different trees and used this method for wind effect. Actually that saved so much time for sim look dev and very fast because of non-simulating anything. I have tried grain and FEM simulations for this kind of mıotion also but this system became time saver for us.

Report

Houdini Grain Constraint Cloth Setup

General / 18 April 2018


I was working on a project at Lighthouse Studio about Cloth sim and tried this setup for cloth. 

-Graind cloth system is 10 times faster than Cloth , 4 times faster than Grain Sheet setup

But at the end of the day i gone with cloth because of more detail. To give drape detail is not easy with grain , this setup can be use for cartoon projects or for not too realistic shots and game maybe.


This is the work flow that i followed. I have converted mesh to lines with convertline node and grouped some points for constraint object then gave them id. After grouped them , i used ray sop and connected secon input to my collision geometry or i can say geometry for constraint and then used attribute interpolate becasue of taking animation data from my constraint object.

With attrwrangel4 sop i targeted points to Position. On the restlenght_multiply wrangle i am giving @restlenght and that controls my lines strech and power of strech for Dop Network. After sim is done, i unpack it and used attritube copy for copying new Position to original mesh's Position. Because after simulation you will still seeing your lines instead of mesh


This is inside of the DOP Network. As you can see that is very simple and easy. 

Popwrangle2:

if(@targetweight>0){
v@targetP = point(1, "targetP", @id);
}

This code is if targetweight is bigger than 0 , use targetP from second input which mean this wrangle will use second input as a constraint becasue of animation is coming inside from second input


and geometry wrangle is running over Primitives with @strength -= fit01(rand(@primnum + @Frame), 0.001, 0.005);


This is the different results of Cloth or Chain or Rope look depening for your project.

Report

Rock Generator

General / 10 April 2018

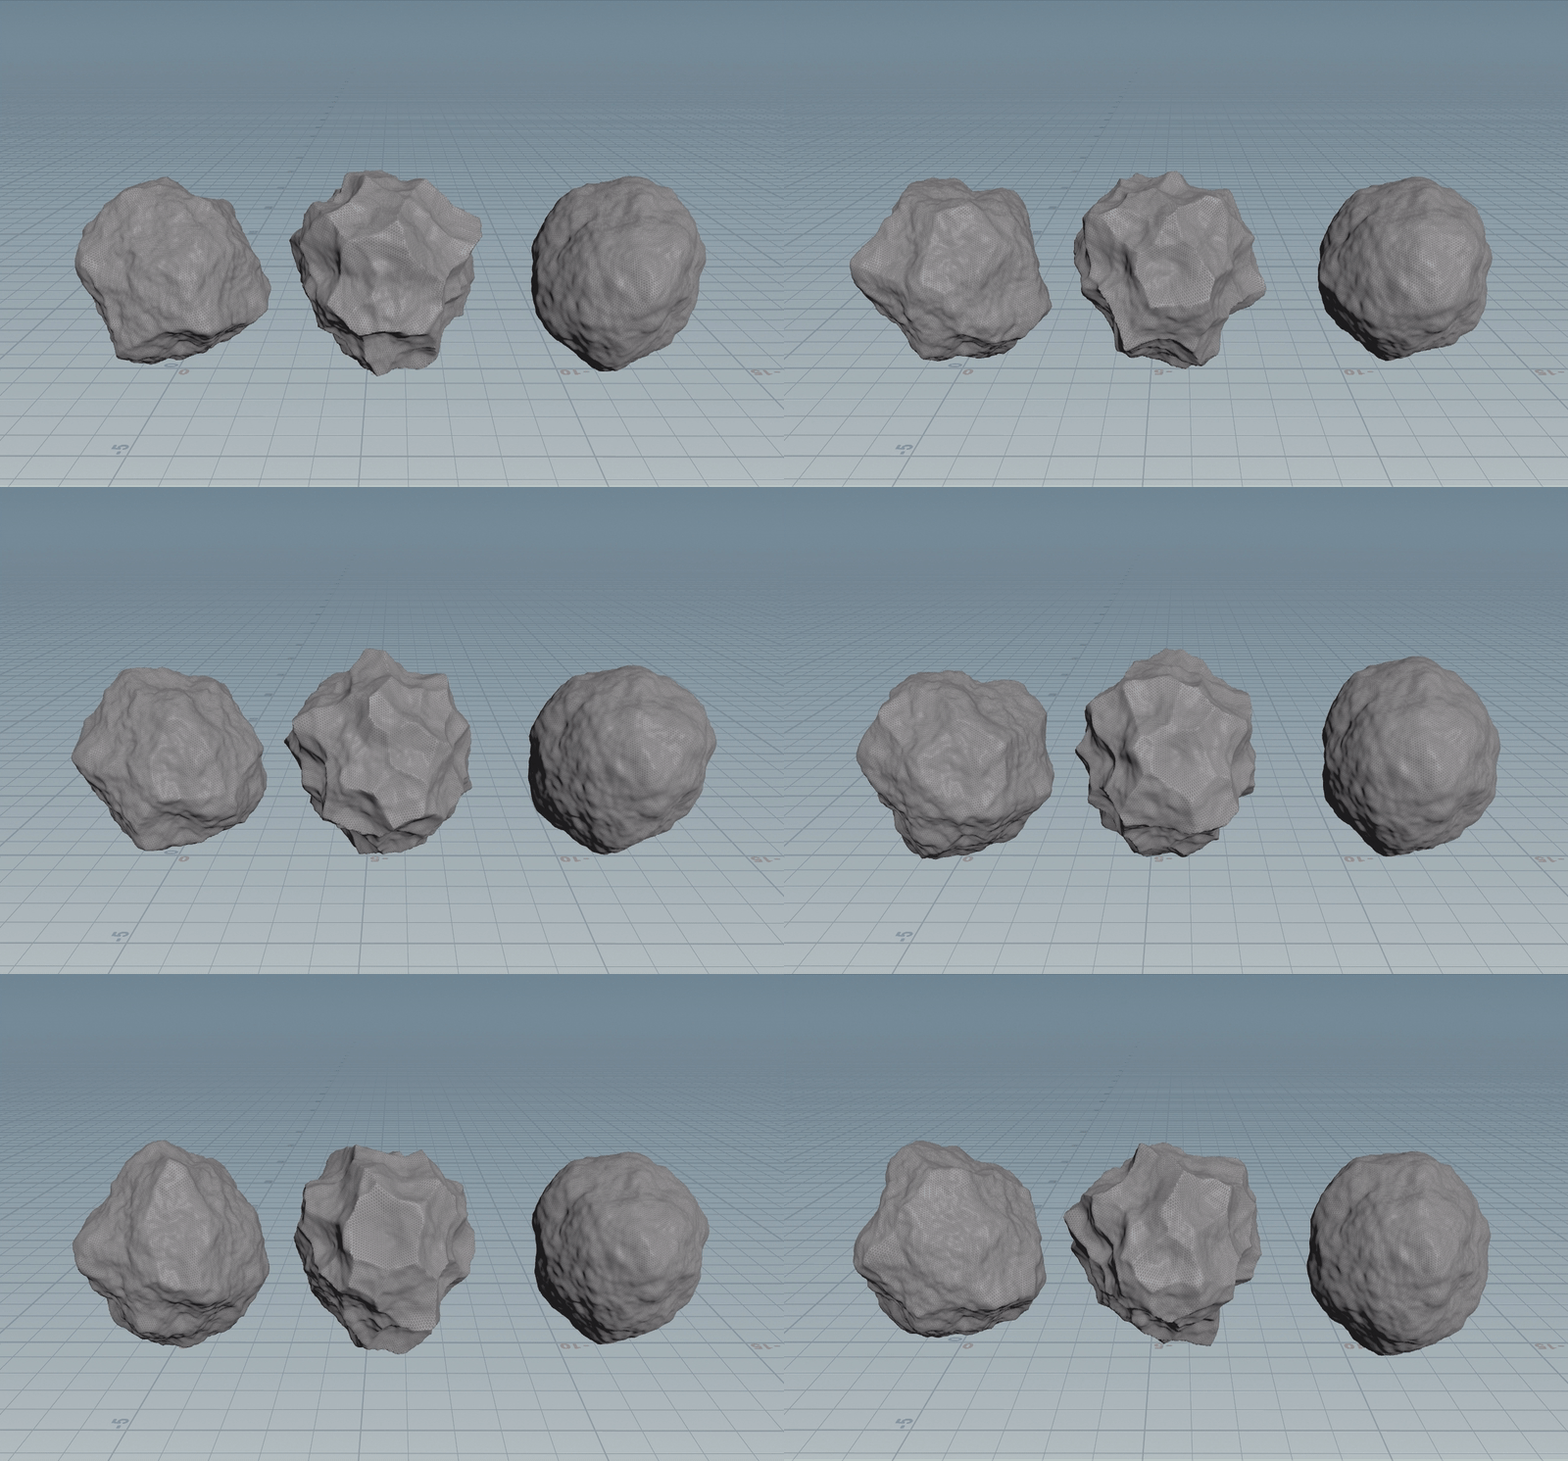
This basic setup allow us to create limitles version of rock shape geometry. 

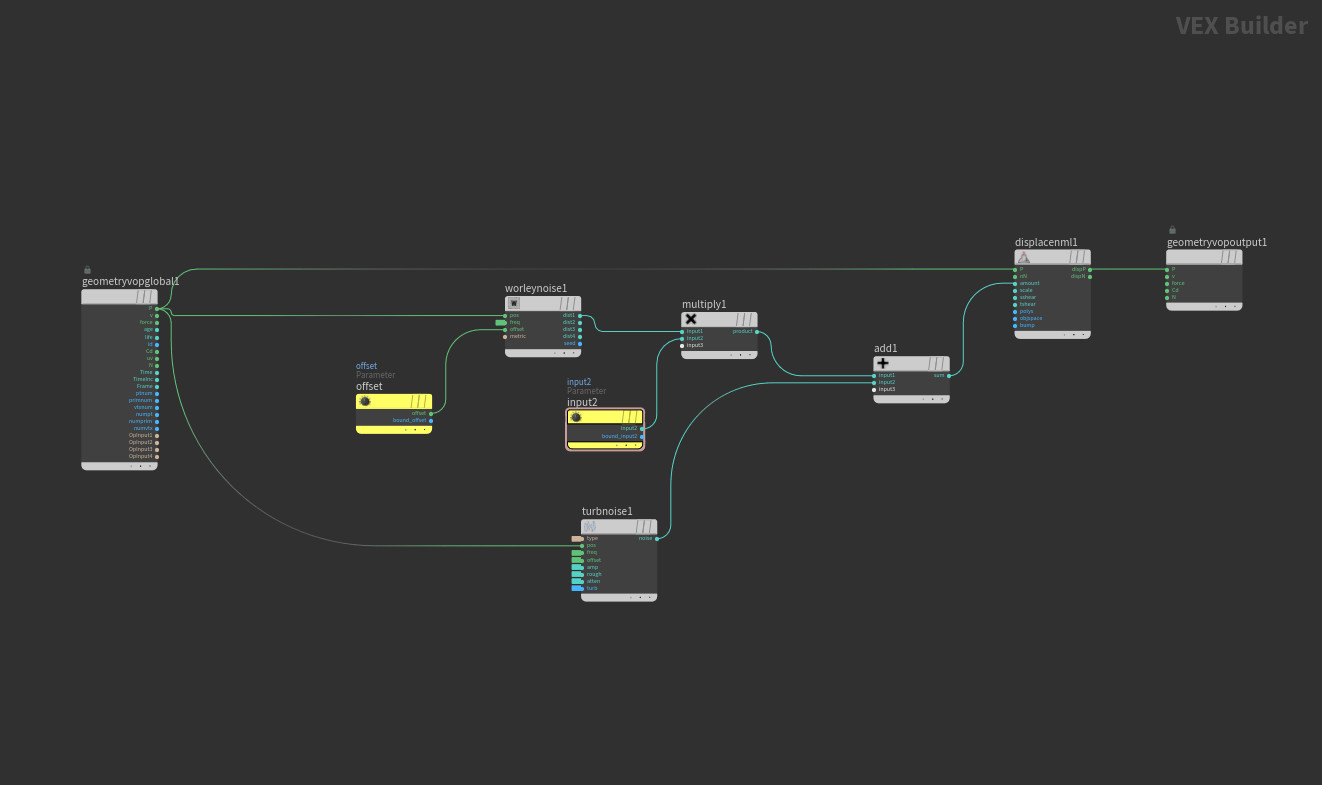
I used VOP Sop for this setup. Basicly using two version of Noise and combining them to each other.


As you can see i connect Worley Noise for basic shape of the rock and multiplied it with Float Parameter. This part of the setup will give shape to our geometry input. Playing with sliders you can deside the shape of your rock. Second noise is Turbulant Noise , I use it to give more details to my main rock shape and added it to Multiplied Worley Noise. 

I used Dislpacement and Position input from Geometry Global's P (position) and Amouth is from our Noisy setup. Then OUT as a P for changing geometry's Position data.


Added few parameter sliders to out of the VOP SOP for controling more easly. There are few sliders for changing the noise type and frequency of the noise.

Report

Houdini Procedural Soap Bubble Setup

General / 25 January 2018

I was dealing with a project about soap bubble interaction. So , after some reach and i tried some methods in Houdini and solved this case for our project. But staying as a R&D for now... at least we have know how for soap bubble. 

Here is a simple setup for project.

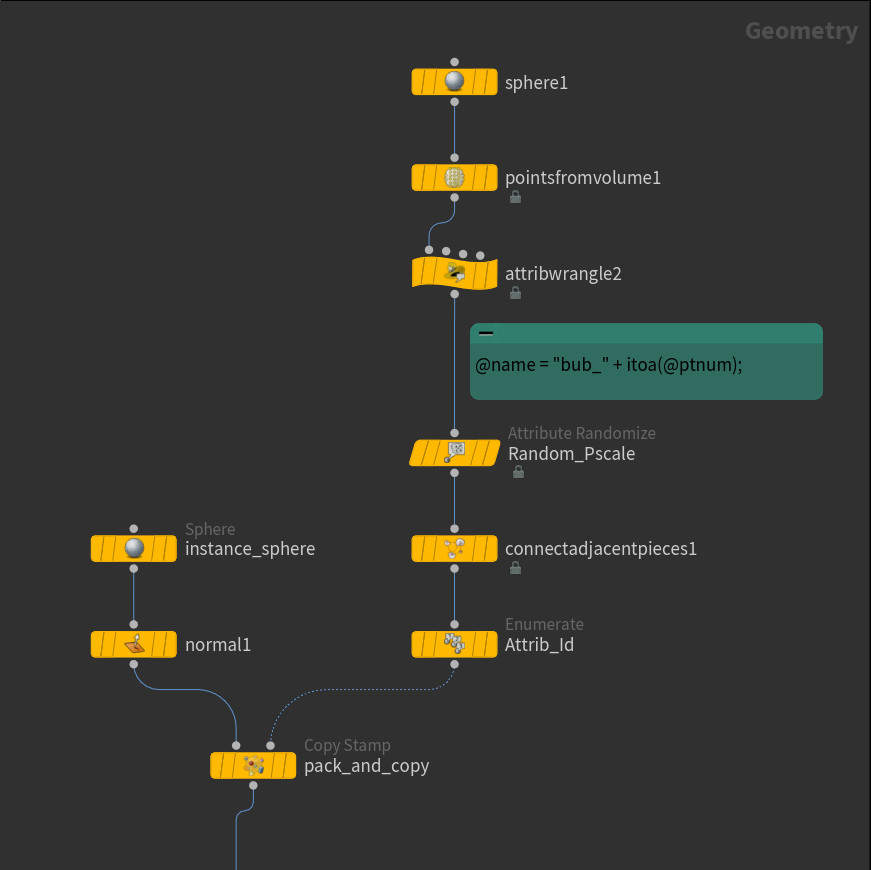
I used sphere and pointsfrom volume for scatter points. Gave a name attribute with wrange and randomized pscale. After that used enumerate sop with giving id attribute to my scattedre points. 

Copied with spheres my scatters and packed them for RBD simulation. When you pack your geometry and give it RBD simulation , they act like a point and easy to conrol your points instead of geometry. 


Here is my RBD sim date. I used RBD Packed Object for getting inside my packed geometry speres , Popattract is for attracting points to the on point (center of the grid) which can change to position. And with rbdsolver spheres touching and pushing each other.


I imported RBD sim data on the left and imported RBD point data on the right and repeated same technique for copy and transfered point data to my geometry spheres. 


After this set up i connected both data output to attribwrangle. 0 input is peak1 sop and 1 input is Pscale_Ramp imoput. This wrangle calculates each sphere's position and area and push each other's poisition. This way they dont intersect. 

           And there is VEX Code below


This is what is looks like after wrangle sop. On the right side as you can see , each geometry intersect each other and duing the rendering that creates lots of problems. And on the left image how it looks like after wrangel sop , they dont intersect each other and geometry's area pushing each other and doesnt intersect which makes better and more natural look of soap bubble


I have created a material with VEX Builde for oily specular map.  This shader calcualte each bubble's area (uv) and giving it rainbow-ish color and using that data for specular color which makes oily look


This is how it looks after applied shader. Taking poisiton from the camera origin and giving rainbow-ish color according to your parameter settings. I wanted  to give more pastel colors.


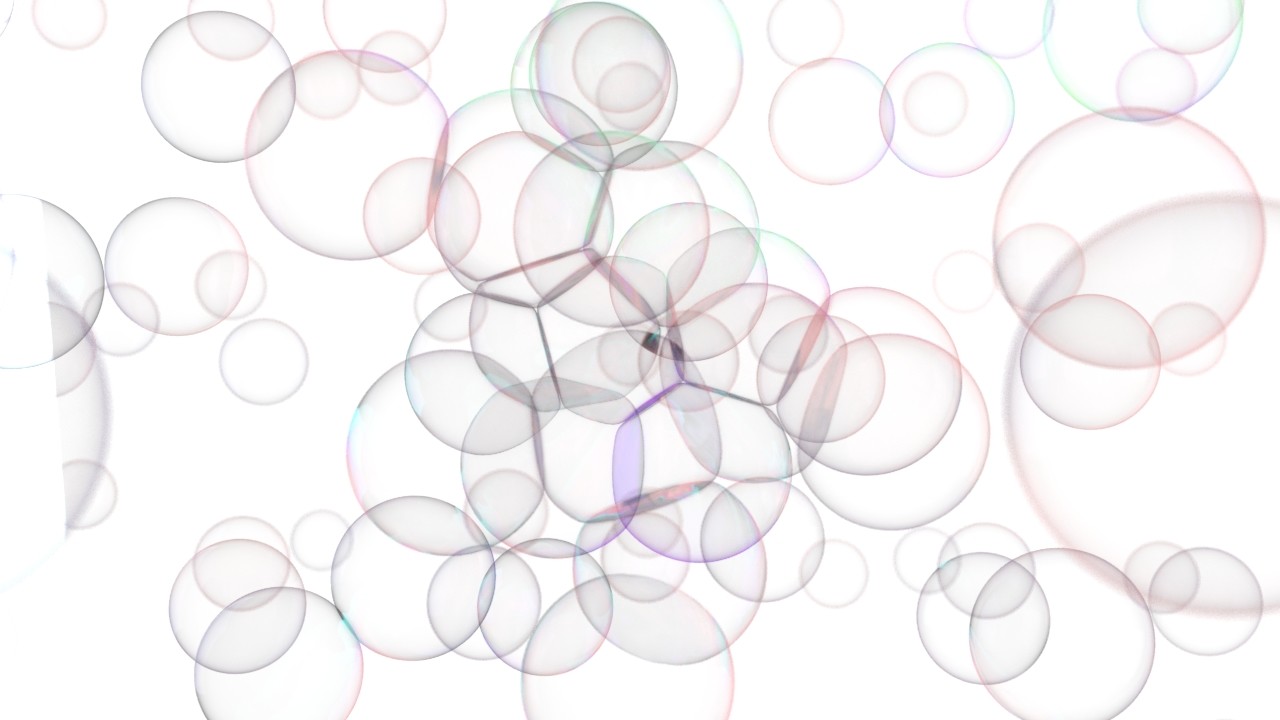
Which a basic render set-up looks like this. As you can see intersection looks better on this way and more natural like bubble intersection

Report

Art Directed RBD Simulation

General / 17 January 2018

Particles doesnt have active or art animated activate data this way we should create active or sleep data out of the DOP Network and bring it to the inside with Pop Wrangle or different methods so i am gonna show very easy method to use art animated rbd simulation with active data animation. I have used this method on our Garnier Tv Commercial for rock fracture shot , check that commercial out.


There is a simple and fast geometry setup for rbd setup.  Lets go with this simple shot first...


Picture below , i made RBD Sim for our Garnier project. If we use RBD Sim , there is active data in it and we can use that data with only couple clicks in the DOP Network. But to use particle with active data and multi-solver is different. I will show how to use that method on this blog.

For this shot i have created a sphere and scatter it for geomerty. On attribcreate sop i am c

alculating miny with $MINY and maxy with $MAXY for giving a color to my object. After that using VOP SOP for color grading. (that is not neccesasrly needed) just red color is enough to give active data to points. After giving red color to scattered points i used attribute wrangle for giving velocity and active data = 0

@v.x = @P.x*@Cd.r;
@v.y = @P.y*@Cd.r;
@v.z = @P.z*@Cd.r;

@Cd = 0;
i@active = 0;


On the right side i added another sphere for animation with transform1 and there is attrib wrangle like 

@Cd = 0;
@Cd.r =1;
i@active = 1;


I have active = 0 data on the left and active = 1 data on right. With attribute an atransfer i am transfering the active data to the points like this.

After transfered animated active data to my packed geometry i assembled and created packed geometry and transfered active attribute. Now all data is ready for bullet sim.


First of all i am using rbdpackedobjects for bringing all packed geometry to inside of the Dop Network and click override attribute and use active. This way our active data will be over-ride and that data we are taking from the geometry sop. We can animate by hand our Black to Red animation out of the Dop Network and then can get it to the inside of the Dop Network and over-ride it to original active data. And after that we can use that data for anything that we want.


On the popwrangle i used @activation = point(0,"active",@ptnum); and created activation data for using them for pop winds

On popwind1 and popwind2 i used VEX for activation like this "wind *= @activation;"

This way when out acitve data turn to the red color (active will be 1) our wind will active and start to work.

Just becasue we used rbdpackedobject we need to feed them with bullet solver and connect them to the multi-solver because or popwrange turned to another solver. To work with multi solver we need mult-solver sop. According to my simulation i didnt need popdrag and that way bypassed it but there will be needed to cooldown your particles in the space. If there is a rotate problem with your geometries , you should use pop drag spin sop also.


Report

Koroplast Garbage Bag - Houdini Pyro Shots

General / 16 January 2018


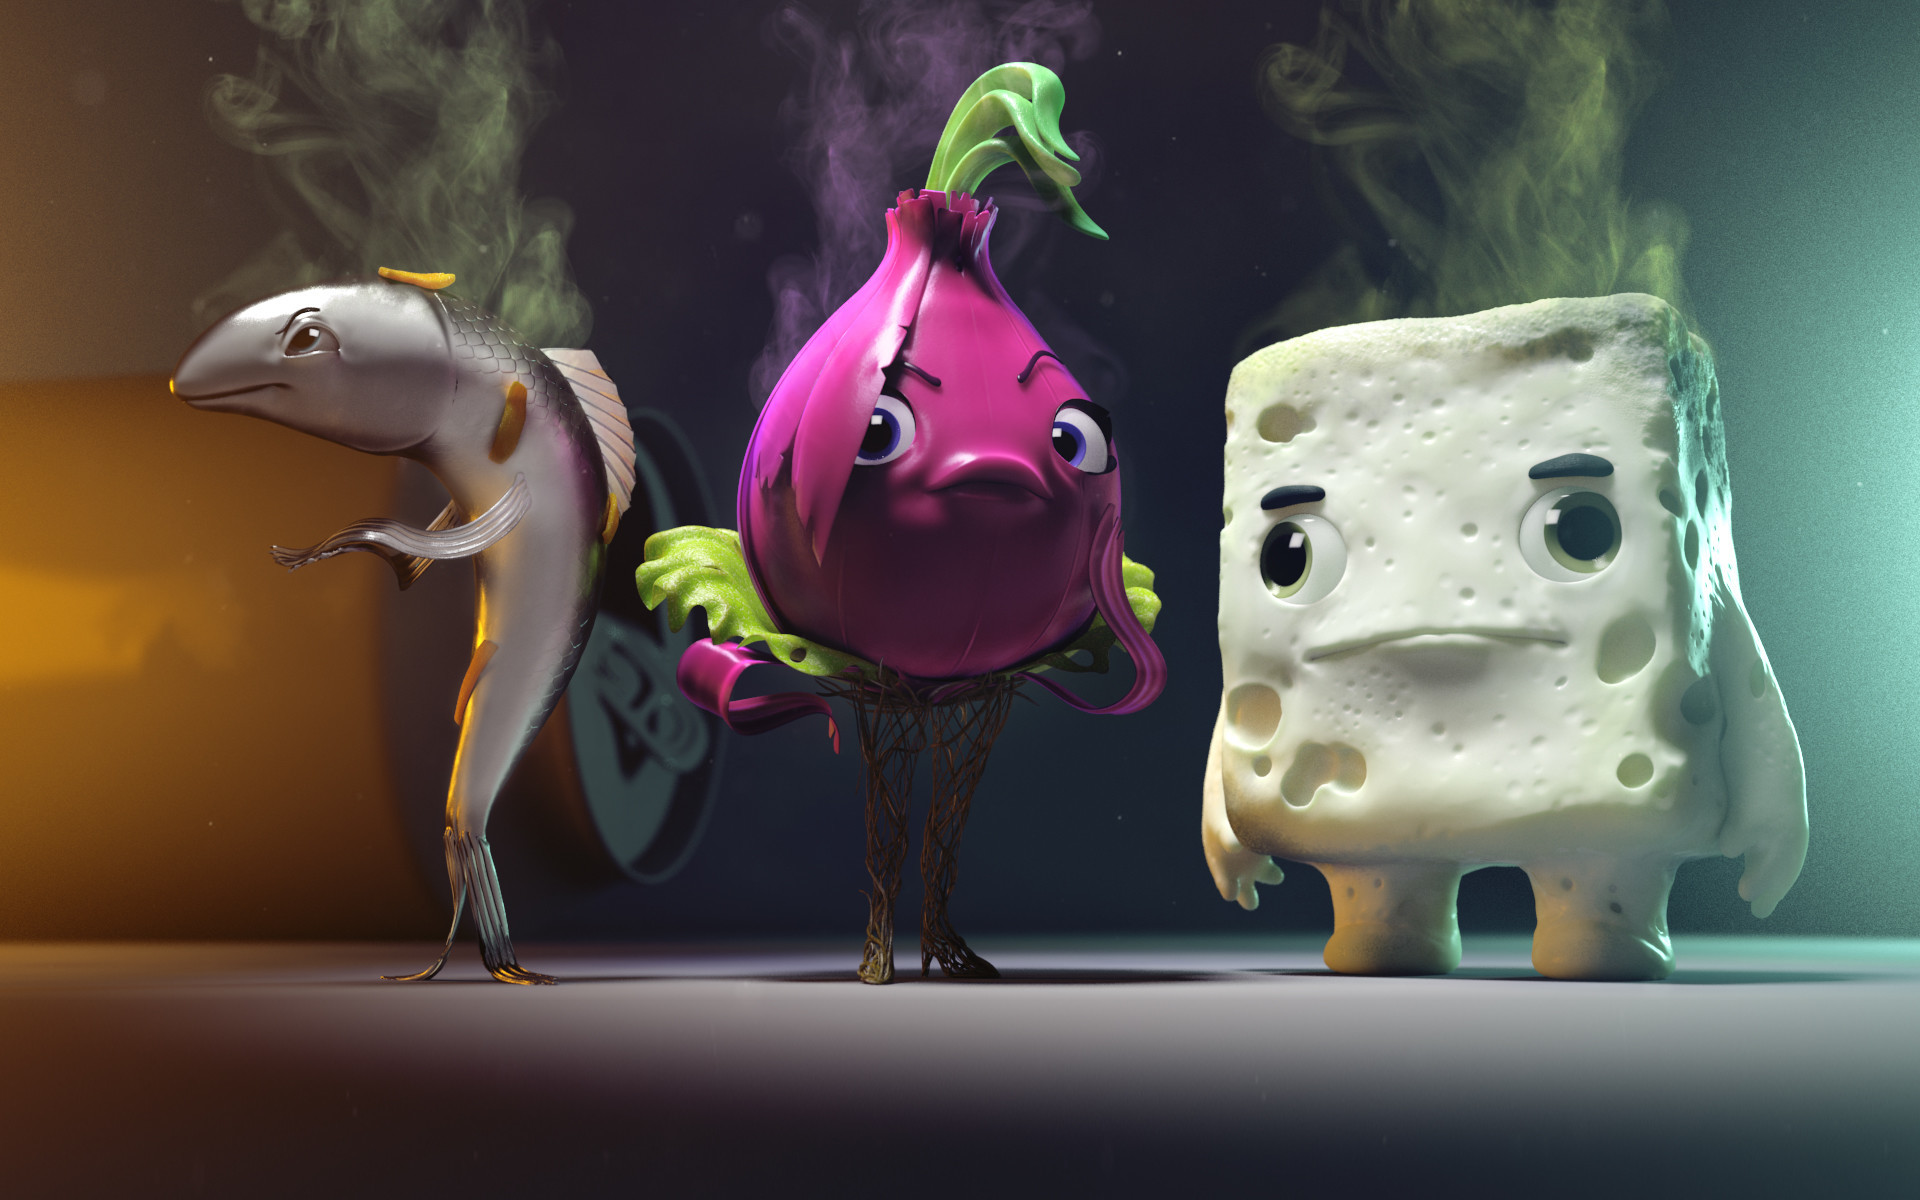
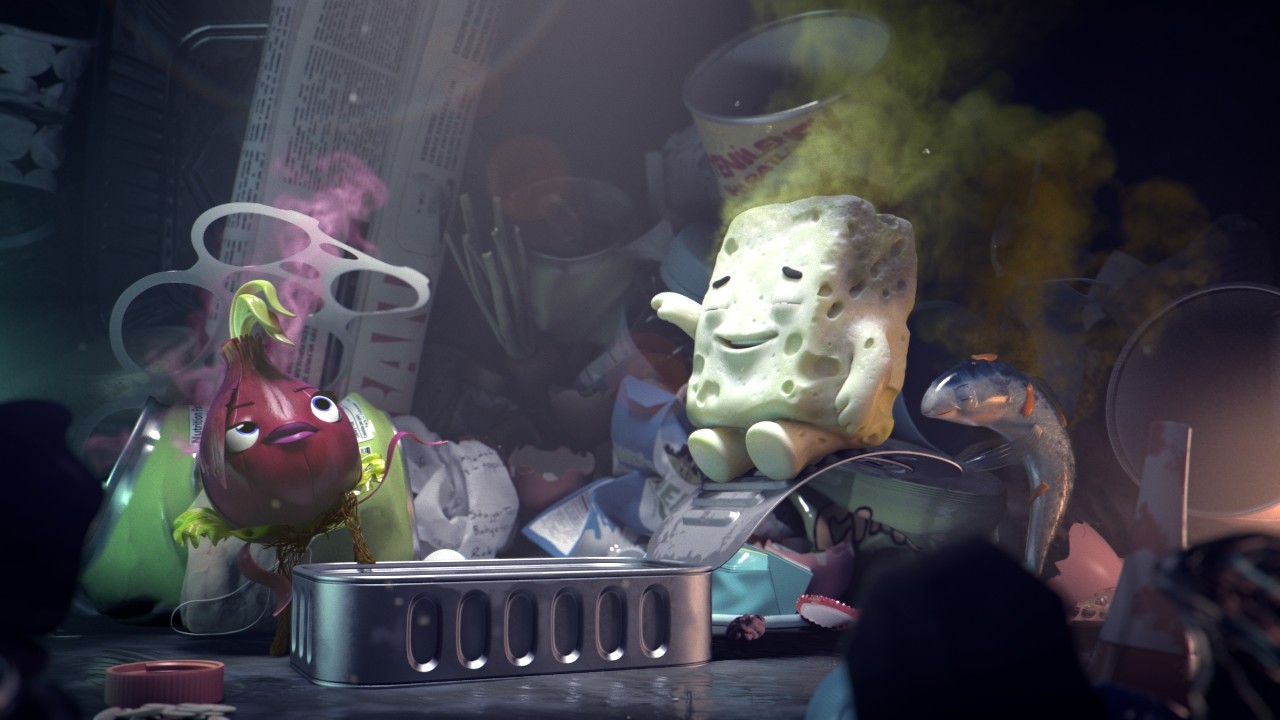
That was one of my favorit project i had a chance to participate while working at Lighthouse VFX Stuido. I was in charge of all pyro shots for the commercial and here are all pyro shot .


Thanx to cgmeetup.net for sharing our Koroplast work cgmeetup.net/Koroplast

This was a nice concept work for the project and i have tried to catch that look for smelly bad smokes.


I have created a custom velocity field with VOP Sop and added  sliders for better control , that helped a lot to control velocity on some area. 

  •  Volume_Box is a limit for veloctiy field and with Scale_to_the_scene sop (transform) i can put the velocity anywhere in the scene.


        I picked a simple point for each character and copied custom velocity field to the characters. This way my velocity field were following the character's animation for every shots.


This is the inside of the custom velocity VOP Sop. System creates few noise and convert that the velocity with parameter and multiply it out of the VOP.


Some of my favorit shots from the project

Report

Houdini Procedural Droplet System

General / 16 January 2018


 I have created this droplet system while working at Lighthouse VFX Studio for one of our project for Fanta.


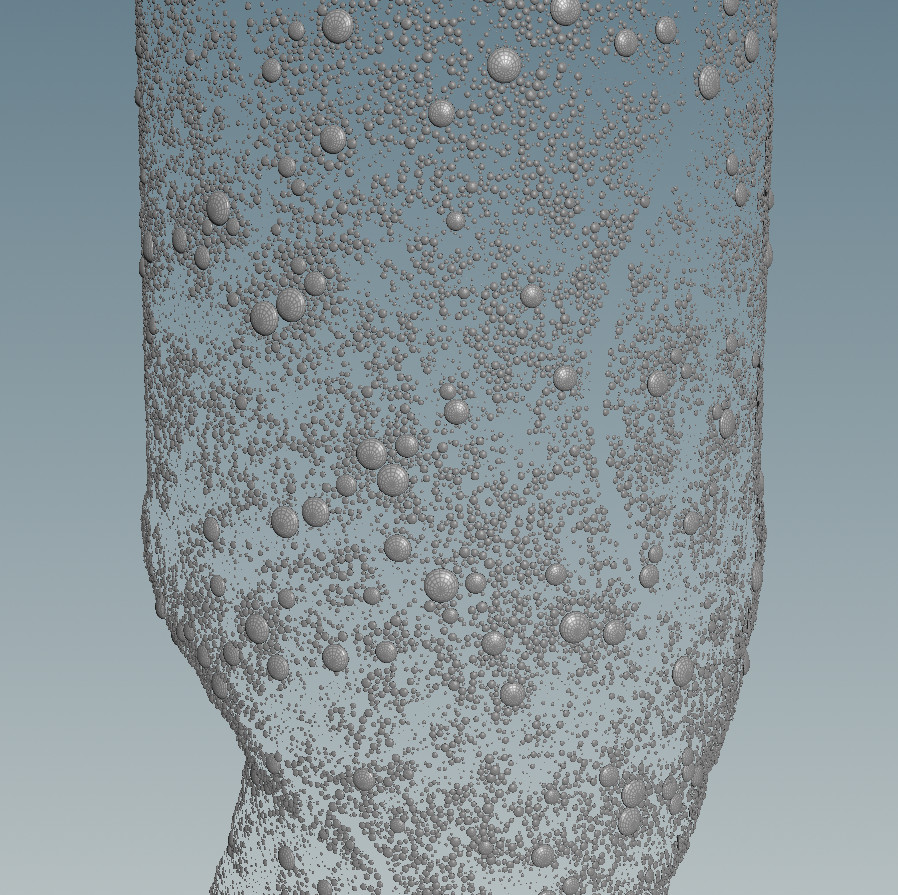
  • This system allow us to create millions of droplets over any surface or shapes. For this project there were 21.993.266 primitives.

  • Big drops effecting from gravity and hanging through down , having drop belly and effecting from noise. This way they look more natural

  • There is a line based drop move , having animation from Carve , this way we can hold or stop whereever we want and more curves more long drop


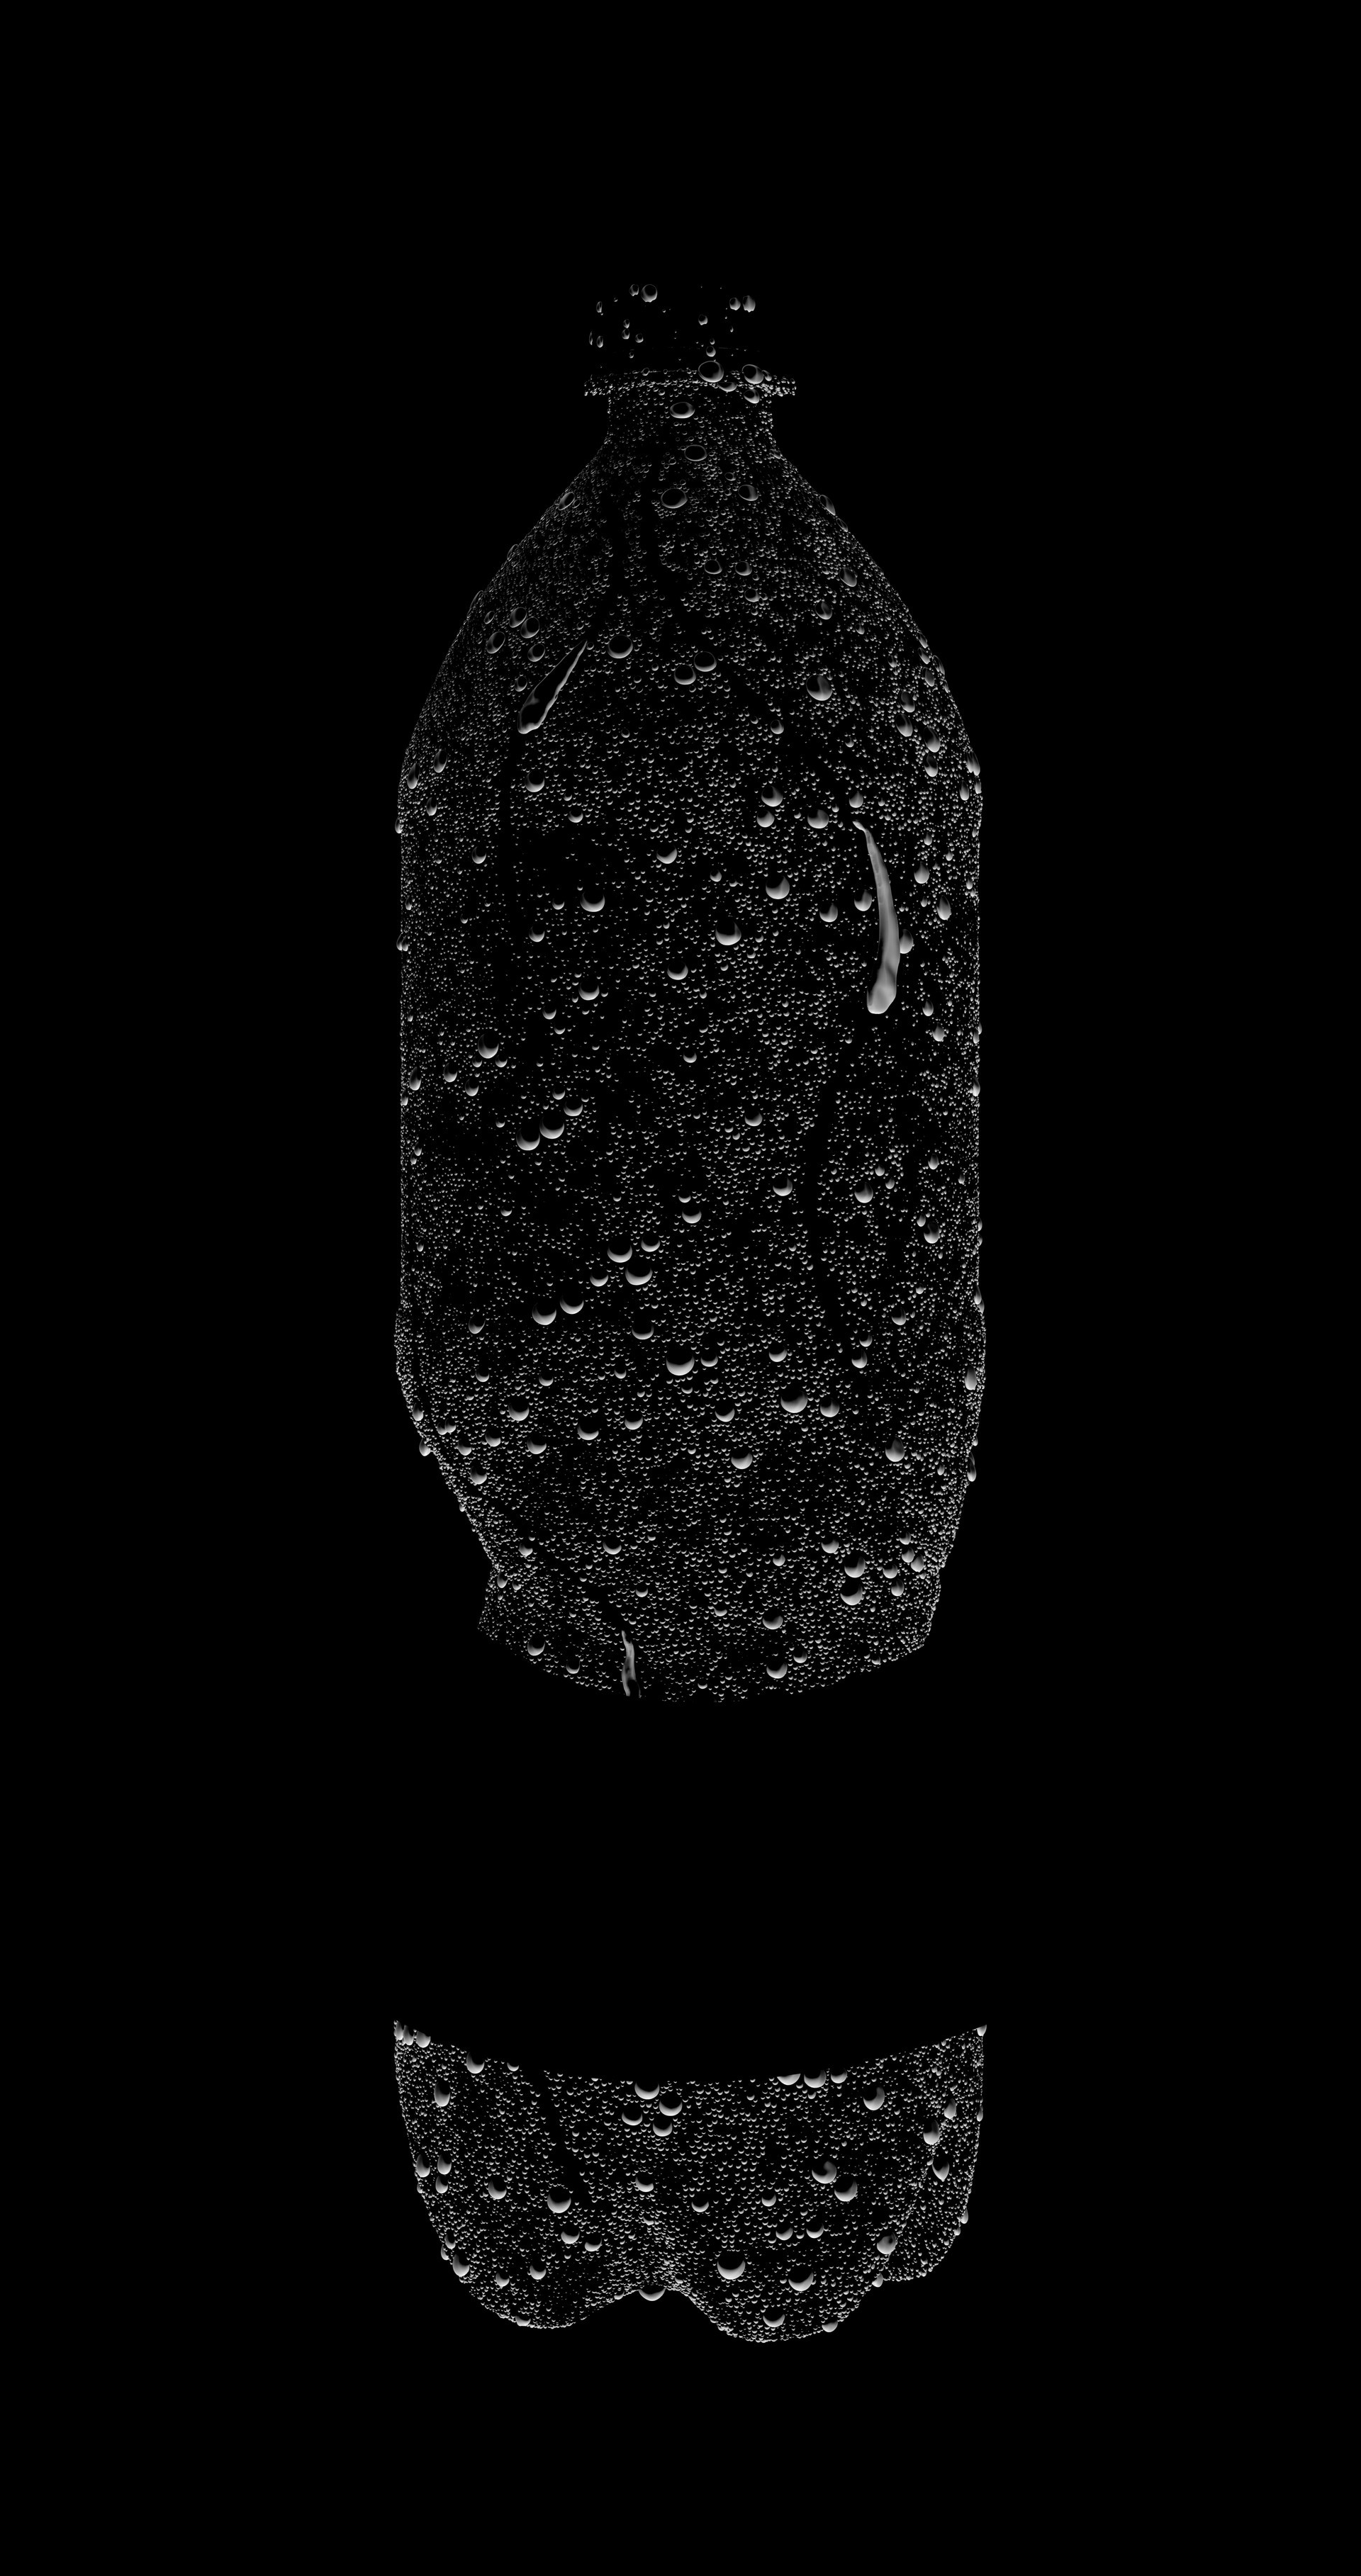
-Example of Work , i cropped it to show drops only


-Another example of bottle droplets

-Scattered Fanta bottle 


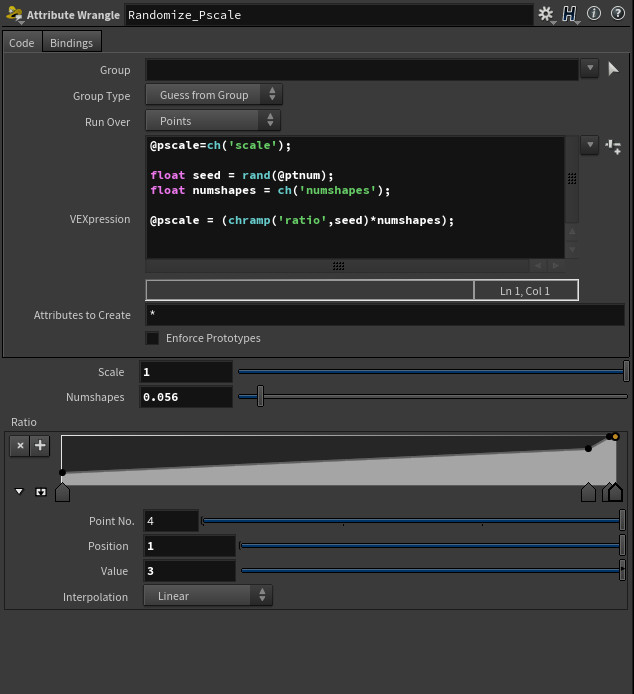
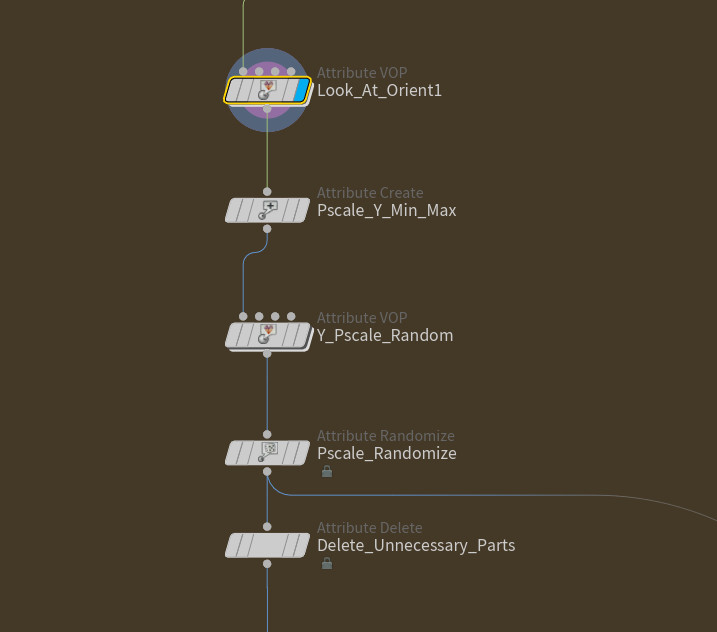
-With this VEX we can control size of our droplets and can randomize them with ramp


-Giving color randomize between Gray & White, this way scaling them by color


-After playing with pscale enough , i distributed my points and getting ready for copying droplets. For distrubution i used QLIB's tool


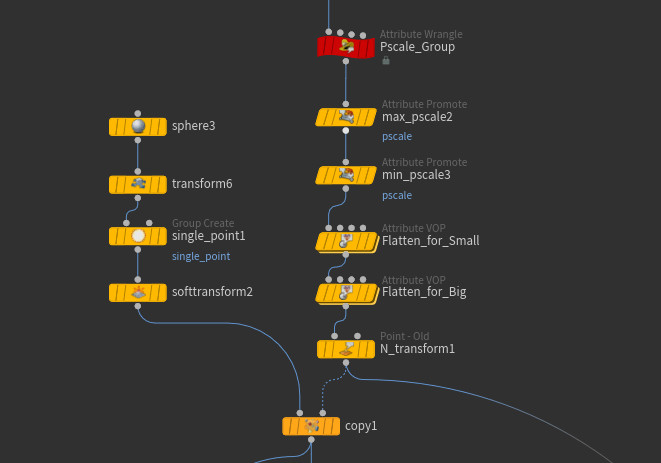
-Calculating Maximun & Mınımum pscale , flatten them little bit for making them natural look. Bigger sizes flatten lesser than smaller ones, then copied my simple droplet geometry.


- This is how it looks after copy the geometry


- Classed them and put in a basic noise VOP for giving amorph shape to my big drops. Foreach loop were little bit heavy and this way used complied loop for making my loop multi-thread. Some sops are multi-thread and very fast with complied loop. Sadely not all sops has that feature but they said soon will be more.


-After looping and giving amorph shape , i packed all geometry this way they will act like a point and could group them by pscale point data. When they acting like a point , grouping is much easier and useful.


-After grouping them by scale, split them to two. 

-I converted VDB to big size drops and subtract them from the bottle. This way i could erase the face which intersects to the bottle and after that i smooth the geometry little bit to give a rounded smooth droplet shape.

-Small size drops i used boolen and subtract from the bottle also. Because to handle small size with VDB is very heavy and expensive. Boolen is much cheaper and better way to go with small size geometry.


Report

Houdini Procedural Tree

General / 15 January 2018

I have created this procedural tree set-up wihile working at Lightouse VFX Studio for our Tv cartoon series "Saham".  

This system creating procedural tree using Houdini Lsystem , VOP & VEX. But for example tree in this blog i used 3d model

  • If you use geometry for tree, calculating each bush's area and scattering same amouth of leaves from each bush geometries. That method makes more natural look for the tree. Other way bigger bushes having more gaps and smaller bushes having too much leaves.

  • Creating new Normal & Orient for leaves and also Converting them for Softimage or Maya with a simple VOP. 

  • Creating wind dynamics for leaves and bushes with VOP. This way we dont need any simulation or so , and also this method more faster more cheaper than dop dynamic simulation.    

  • Creating 4 color and scale procedural leaves.

  • Calculating total amouth of leaves and giving them randomize between 0.7-1 scales. Editable scale with a slider   

  • Calculating total amouth of leaves and scaling 1.5 time of %15percent for wild/longer leaves.This method makes tree more naturally. Editable scale and amouth with sliders also


This image shows how it looks at the end of the day.


- This is a tree model that i used. Modelled by  Samet Bulduk, modelling artist of Lighthouse VFX Studio


-Also can create a tree using L-System in the Houdini. I made this Houdini digital asset file and save it to the file if anybody wanna use. This Houdini digital asset allow us to create many many trees just editting by sliders which is very easy to use. You can check Codes/Rules from the image. 

I have made four level for tree which are Body and 3 level of bunch or twigs. They all can edit from otl sliders.


- Look at orient VOP creates new orient for leaves. Calculating each geometrie's normal and creating new orient.


- Calculating color grade between dark red and red , scattering leaves point by color. Closer to the tree makes darker color and this way we can hide points that not seeing or staying in the back. If tree body touchs to the bush , it gets darker red which scatters less points which makes faster system.


- New orient caltulating system


- If need to transfer orient to Softimage or Maya , there is a VOP for it


- Wind simulation VOP , creates wind sim system it is faster and cheaper than wire or dynamix simulation. Gives a look on real-time


- Wind simulation Control, we can offset it by time $T which makes realistic wave actually. 


Report